Are you the type of person who wants to build something big? Something that doesn’t overwhelm you but gives enough exposure to different technologies that work together. Here, I hope to detail my journey of building a blog afresh (technologies used, suggestions, red flags, pointers).
It took me eight months to launch. But if we’re being honest, had I not slacked off, it wouldn’t have taken me more than a couple of months to get my tasks done.
The following points discuss ways to help you get started and to not make the same mistakes that I did:
- Why Do You Want to Have Your Own Platform?
- Choose Your Tech the Wise Way
- Design First, Code Later
- Research, Learn, Research
- Escape Tutorial Hell and Start Actual Coding
- What to Do When You Feel Stuck?
- My Month-Long Hustle
- A Note to the Beginners
A fair warning: you might need a hot cup of beverage because this isn’t ending anytime soon!
Why Do You Want to Have Your Own Platform?
We already have several tools of experienced groups of people, serving everyone to start their blog, with no hassle (e.g., dev.to, Medium, Hashnode, etc.). In a nutshell, it removes distractions and allows creators to focus on the content.
But as a web developer, I am always tinkering with tools to build stuff for the web. It is the best playground out there. So, I made a raw static blog. With my custom tweaks, it wasn’t too much of a vast project for me, and it boosted my skill set, assuring me I can build stuff of my own.
I had little ideas to blog on. Therefore, I did what I knew at that moment and converted whatever I had learned while developing into a blog post.
Also, having your own platform feels a bit more personal, and you can change it whenever, to whatever, or however you want. But yes, no one can deny the value of a community that the above sites bring. So, I suggest that you get the best of both worlds, and cross-post your content on the above sites, linking it to the original source.
Choose Your Tech the Wise Way
Prior to jumping onto the code, put some time aside to plan tasks out. Before proceeding with the tech stack, I wanted to have a mental model of things that I had to accomplish. My initial ambitions included
- a combination of my blog and portfolio, so that people can see my projects too
- a proper design of colours and font that are eye-catching
- a dark mode support
- some basic animations like background colour change while hovering, button click shadows, etc. fast page loads with a good SEO
It’s agreeable to have a clear picture in front of you, so you can remain driven in the face of blockages.
After a bit of research on recent trends, I went with the following tools initially that complemented my ambitions well:
- Next.js, for generating a static site.
- styled-components, for easing the styling process.
- next-mdx-remote, for managing mdx files.
- rehype-prism, for highlighting code syntax.
- next-seo, for managing SEO stuff.
- next-pwa, for PWA support.
- use-dark-mode, for handling dark mode.
- splitbee, for site analytics.
If you want to learn a specific tech or tool, that fits the use of something that you are working on, then you should add it to your tech stack list. In this way, you grasp while creating (slam dunk! 🏀).
Design First, Code Later
“Let’s get this party started!” cheering to myself, I created a next-app. I installed a few dependencies and set up the initial folder structure.
But wait, hold up! Where are the designs? Should I code with a hazy picture of my future blog that always varies? Or should I let my thought-process get finer by creating designs? Obviously, the latter.
Getting your designs ready before coding helps you stay on track and saves you from bad UI/UX in the beginning.
But I am not a designer. Designing is hard!
Figma is an easy-to-use, collaborative app, accessible on your browser. It has a wide community of designers, who provide amazing plugins to start with basic wireframing and creating low-level designs. Plus, you could always use a simple pen and paper. Just have something visual in front of you.
In the beginning, I had spent a couple of days to figure out the perfect colour combination and fonts. My overflowing concern in colours for dark and light modes left me overwhelmed. It restricted me to direct attention on critical topics.
Colours and font decisions are fun, but first, try to form a basic structure for the website, and try to tackle the hard parts like spacing, mobile responsiveness, etc.
Designing can be time-consuming if you try to be a perfectionist. It exhausted me after dedicating a month to it. A week is doable, but nothing more than that. Your designs help solidify your initial understanding of the layouts and structure.

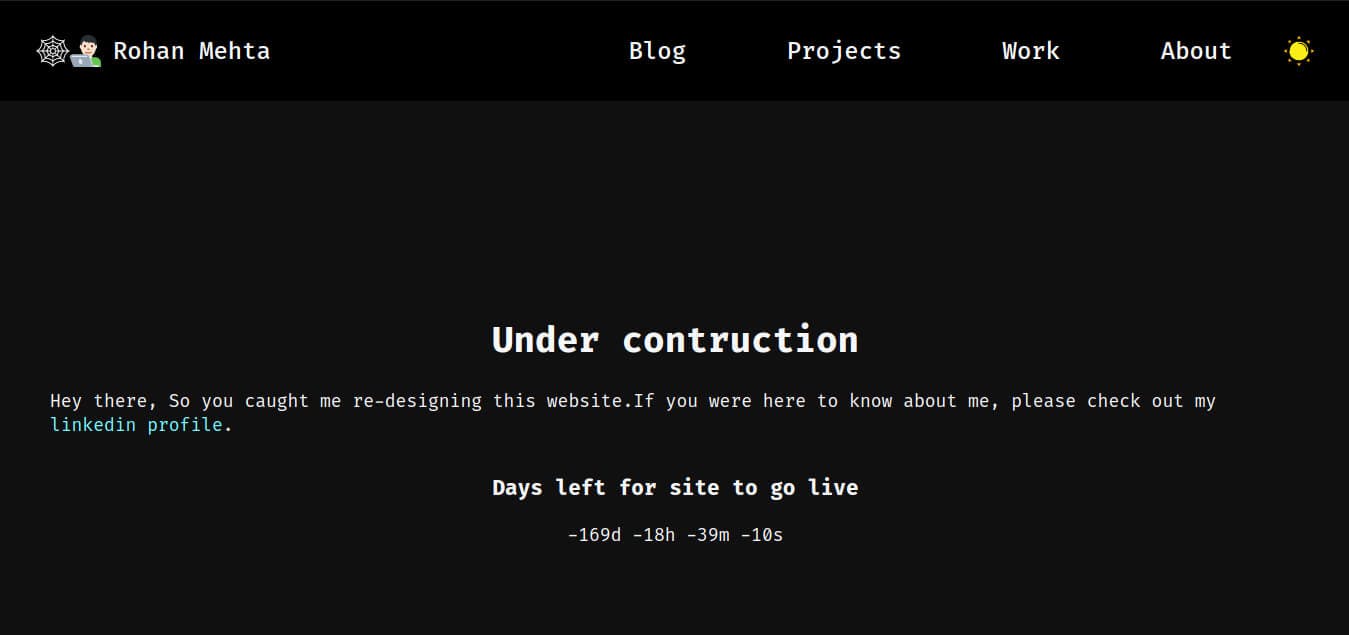
One of my many hard-learned mistakes, I had put up a timer for three months on the index page, saying ‘Under Construction’. Don’t do this, as it could heavily harm your SEO and page ranking on Google search.
Research, Learn, Research
After my internship finished in August, I took a sabbatical leave from coding. This prevented me from reaching burnout and cleared out a way for more ideas.
Before resuming my work, I glanced at the list of ideas I was maintaining, all of it coming back to me. Going through it again, I realised that my previous designs lacked polish. This allowed me to punch in a few more ideas and improve the previous ones.
Maintain an idea or feature log to give yourself a head start as and when you are back at it.
As I wanted things to pick up a pace, I turned over to Tailwind CSS for a try. A lot of time on hands-on tutorials on YouTube also provided me with fresh ideas.
This phase was quite rewarding. I had figured out a couple of things like
- MDX integration
- animation with framer-motion
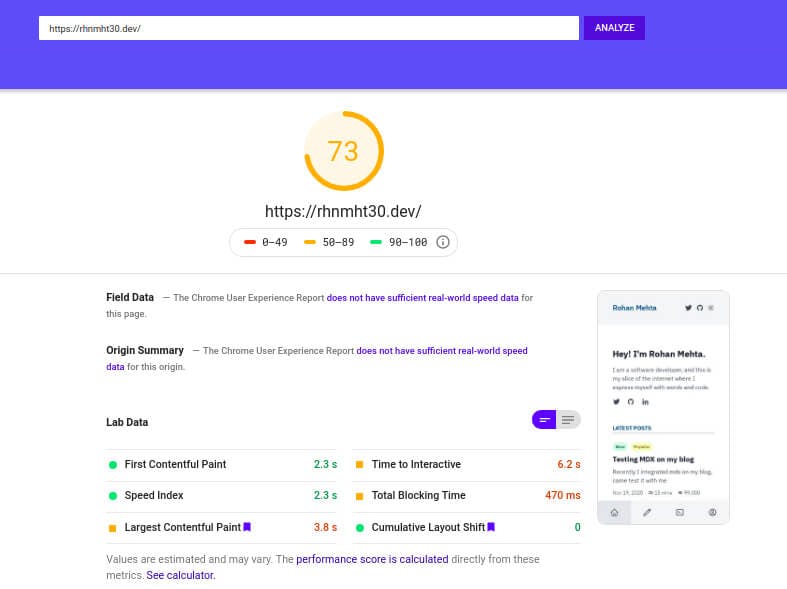
- lighthouse optimisations
- native feel on mobile devices, using bottom navigation instead of sidebar navigation. typography and putting the main content in the middle for better readability
Escape Tutorial Hell and Start Actual Coding
In time, I realised that tutorial hell had trapped me, watching other people build things on a loop. Not knowing when to actually begin, sometimes watching tutorials can be pretty comfortable. But in reality, you aren’t putting that newly got knowledge to any use. It would just vanish away in a week. Such a realisation should come early, as it could protect a lot of your time. Stop watching tutorials until you are in a tight corner again.
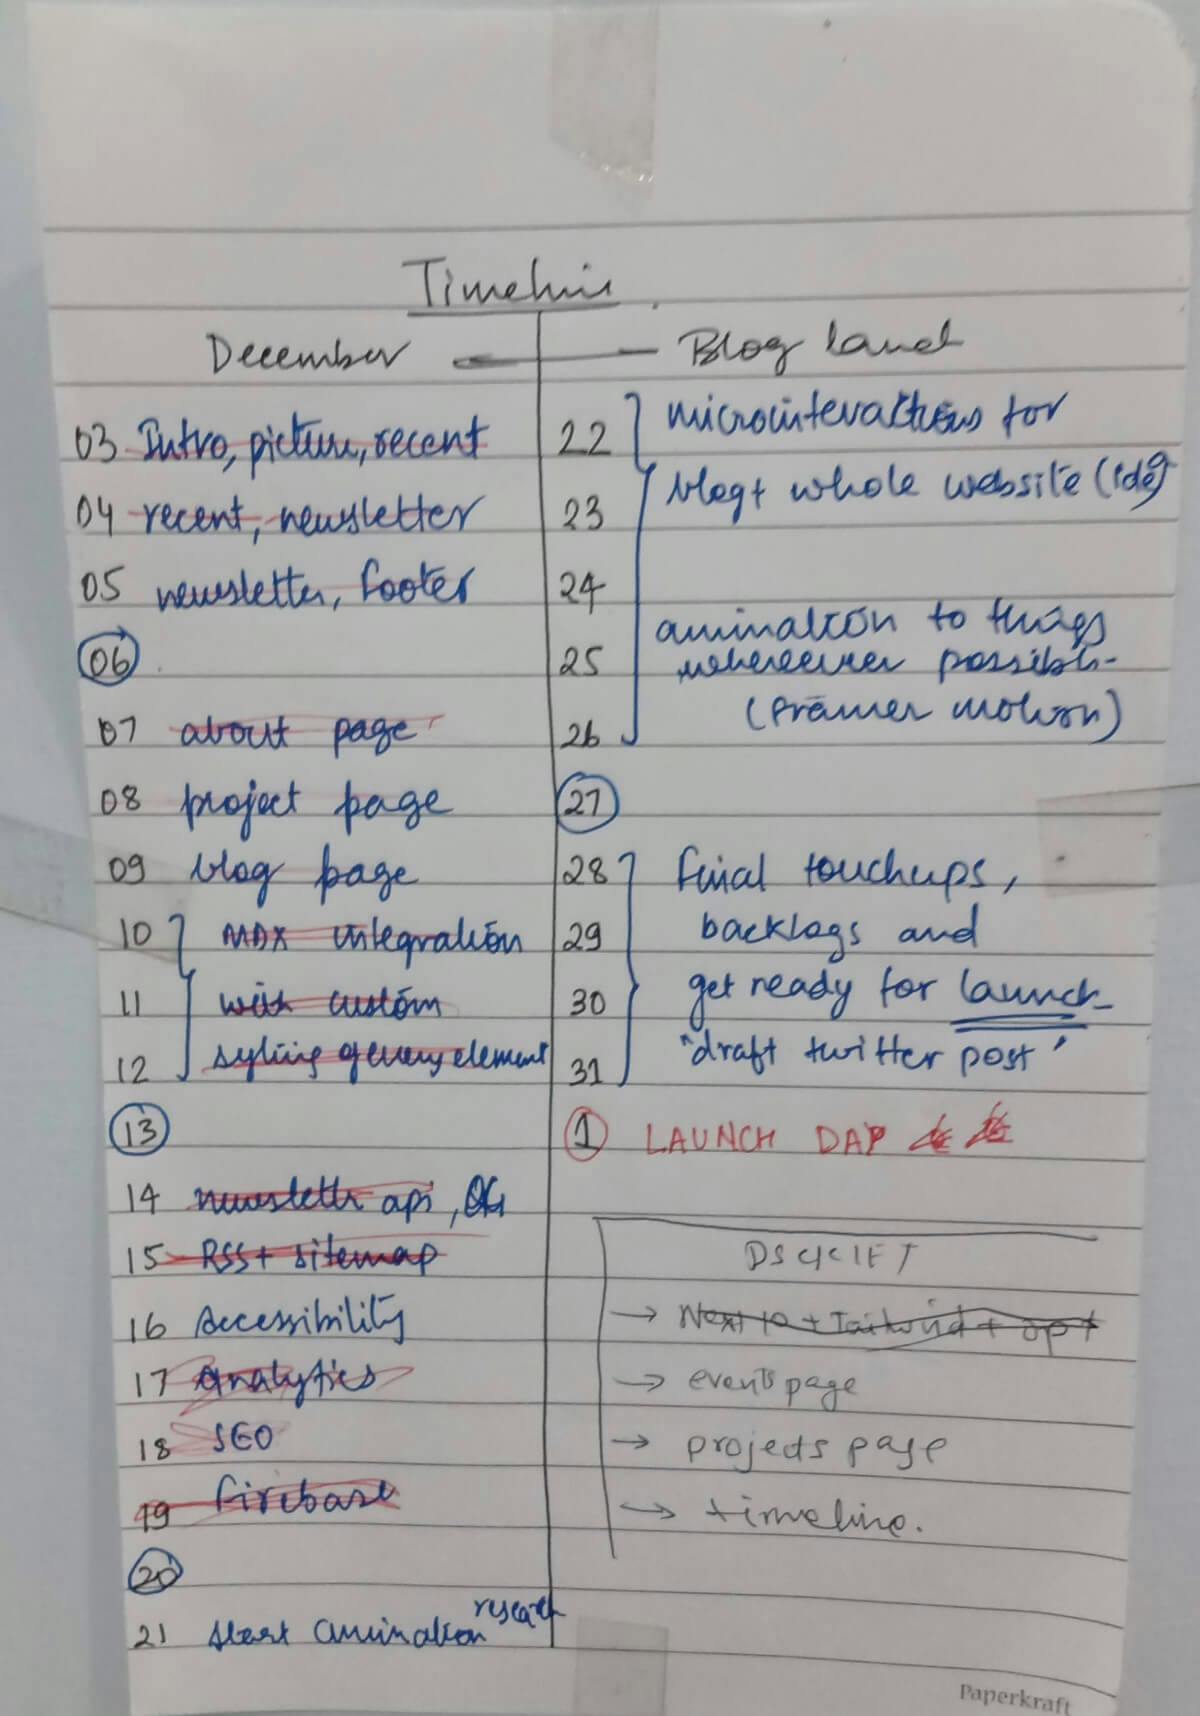
To get yourself all pumped up before coding, I would suggest creating a list of activities to carry out on a per-day or a per-week basis. Create a month-long plan, outlining things that you’d do every day. Planning a list in such a way did not overpower me, and also allowed me to take minor breaks in between if I were to get stuck.

I upgraded and removed several packages and re-setup my project. My designs were becoming a reality. With a tool like Tailwind CSS, a non-designer like me was able to create decent-looking websites. From then on, Tailwind CSS was my go-to CSS framework for my side-projects.
During the build process, it's nice to have a different opinion from someone you know. I gave a sneak peek to a couple of my friends, and their initial reactions were inspiring. They liked the new design better than the previous one, assuring me I was moving in the right direction. This could also help you fix those features you were content with but had mixed reactions from others.
What to Do When You Feel Stuck?
Everybody gets stuck sometimes, and it’s alright. I like to think of it hopefully. Because then I get to chase that feeling of accomplishment upon solving it. And if I cannot, then there is always room for more learning. You fail, you learn; you win, you grow. Don’t want to sound pretentious, but sometimes a problem can be quite hard to solve. My advice would be to get up, leave everything, go for a stroll, or watch a movie. Clear your mind and start afresh.
My Month-Long Hustle
During the last month, the most challenging part for me was MDX integration. Good thing I had watched a lot of tutorials, so I was aware of what I was doing (ha-ha).
I used next-mdx-remote to read and convert MDX (markdown with jsx) to HTML.
It works in the following steps:
- Process MDX to HTML. With custom components, it passes raw markdown content. This saves us from importing components in the MDX file itself.
// process-md.js

function getFileData(filePath) {
    // read the file contents
    const fileSource = fs.readFileSync(filePath);

    // extract frontMatter data and raw markdown
    // I am using a `matter` for this.
    const { data, content } = matter(fileSource);

    // process the markdown with your custom components
    const mdxSource = await renderToString(content, {
        components: { img: CustomImage, code: MyCodeBlock }, // pass them here
        mdxOptions: {
            remarkPlugins: [
                require("remark-autolink-headings"),
                require("remark-slug"),
                require("remark-code-titles"),
                require("@fec/remark-a11y-emoji"),
            ],
        },
    });

    return {
        mdxSource,
        frontMatter: {
            ...data,
        },
    };
}
- Hydrate the content. Combine both processed markdown and jsx components, and render them on the client-side.
// pages/blog/[slug].js

export default function Blog({ mdxSource, frontMatter }) {
    const content = hydrate(mdxSource, {
        // pass again for hydration
        components: { img: CustomImage, code: MyCodeBlock },
    });

    // use common layout to render a blog post
    return <BlogLayout frontMatter={frontMatter}>{content}</BlogLayout>;
}
- Add optional plugins. To use remark and rehype plugins, specify them in the
remarkPluginsarray in the first step.
Read more
why it’s better than next-mdx-enhanced, and what it is solving.
While shaping this, it cramped me in a scenario that I had to implement a ‘copy to clipboard’ feature for the code blocks.
Initially, I was going with @mapbox/rehype-prism, a rehype plugin for syntax highlighting that also supports line highlighting. I used it by specifying it in the plugin array of next-mdx-remote.
In this method, when the next-mdx-remote finishes with the conversion, it splits out the HTML. It contains divs and span with class names around the elements, which need different styles according to their type. (See the example conversion below.)
// example.js

import { Flex } from "@chakra-ui/react";
/* generated html for above code. */

<pre class="language-jsx">
    <code class="language-jsx">
        <span class="token keyword module">import</span>
        <span class="token punctuation">{</span>
        <span class="token maybe-class-name">Flex</span>
        <span class="token punctuation">}</span>
        <span class="token keyword module">from</span>
        <span class="token string">'@chakra-ui/react'</span>
        <span class="token punctuation">;</span>
    </code>
</pre>
For syntax highlighting, I needed to specify styles for every token by targeting all the generated classes. For example, in the above code class="token string" is generated class to target the styles for the word @chakra-ui/react. To apply those styles, I target those elements using CSS class selector.
The issue is that I would not be available to grab the raw text that I want to stick to the clipboard whenever the user clicks the 'copy to clipboard’ button. Because @mapbox/rehype-prism inserts its own divs and spans among the code text, sticking to the user’s clipboard.
As I didn’t have enough time to play with it, I went with another package, prism-react-renderer. It allowed me to access the raw code text in between the conversion process of next-mdx-remote, for it is a wrapper around the <code> block.Therefore, I use it to stick it to the clipboard on button click with ease.
I could then style each line of code separately if I wanted or use a pre-defined theme such as Night Owl by Sarah Drasner.
As I am writing this, I realised that I could have targeted the <code> element from the DOM on button click using document.querySelector. And copy the inner text using innerText method on that DOM element.
I will try it after launch since prism-react-renderer has contributed to low lighthouse scores. On inspecting, I found a lot of unused JavaScript, being parsed on the client-side, increasing the total blocking time.

I felt held back on a few more things, like the dreaded light flicker issue because of dark mode and the flash of unstyled text (FOUT) because of slow downloading of fonts.
I solved the dark mode flash issue after reading a comprehensive blog about it by Josh Comeau. And for the FOUT, I stopped using Google fonts and self-hosted my fonts, with the font-display property set to optional. Read more about this here.
Finally, I concluded all of my initial requirements with some added features. I am merry with what I have and quite glad of my efforts.
A Note to the Beginners
Had anyone asked me to model a blog two years ago, by all means, I’d have surrendered in five minutes! When I had set off with web development, I did a bunch of JavaScript exercises. And only when I was comfortable enough, I created my first website, my portfolio. Although plain, it was the start of building small things, deepening my knowledge pool.
As a beginner, I know things can be pretty bewildering. You want to build cool stuff and put it out there, but sometimes, fear of things not working out, or not having enough experience with tools, can pull you back.
I can only suggest to keep learning, exploring new things, and creating an initial understanding. Then you move forward to develop something out of it. Strengthening such initial concepts will guide you to make much bigger things in the future.
Therefore, over-engineering my blog served me to culminate all those small lessons into a project of great size.
I still need to improve and optimize things, but I am at peace with it right now. 😌
Shout out to Manya for editing my drafts. 💜
Have a good one. 🍻
Rohan